We have limited garage space and a growing fleet of kayaks. So my latest project was a movable kayak rack. A couple 2x4s and some pvc pipes and fittings and some casters and we now have a light weight movable kayak rack. I added a bungee net to the top for paddle storage.
This blog is about my adventures in Kayaking and other outdoor pursuits. Mostly I will cover kayaking but may also cover hiking and rock climbing.
Showing posts with label kayak safety. Show all posts
Sunday, October 16, 2016
Friday, November 13, 2015
Novice in a rec boat in trouble and how he was helped.
On Sunday the 8th of November 2015, we had set out for a nice paddle on the Potomac. We launched from Belle Haven Marina and were going to head south a few miles and then paddle back. We paddled out of the mooring bay past the sail boats and out into the Potomac.
I was paddling my wife's NDK Surf, which I never get to do, so I was playing around and out ahead of the group going straight out. The rest of the group paddled at a south easterly angle past the pebble rock shoals that are exposed at low tide.
Conditions: The tied was going out and about 40 minutes from low slack. The winds were blowing around 10 MPH and the skies were clear. The water temperature was around 59 degrees and that air temp was in the high 50's and would settle in the low 60's.
I hear my wife call out that she sees someone on one of the shoals and there was debate in the group if it was someone in trouble. My wife says she is going to check it out. I am a little ways from the group but I turn to rejoin them.
In the link below you can read my wife's write up on what followed:
The lorax's Wife incident report from the paddle on November 8, 2015.
So, hopefully you read her report. What follows is my report. It will be judging but every event has to be looked at with an eye on how could it have been done better. The person I am going to be harsh on is mostly myself.
The group arrived at the scene a minute or two before I did and my wife was calling to the guy in the rock shoal from the north side. I came up from the south side and could hear the guy (from here on out to be know as the victim) sobbing. I am out of my boat and on the shoal beside the guy calling out to him while everyone else is still in their boats. My wife has sent someone to the marina since we are so close and ask a member of the group to retrieve the victims kayak which we see about a hundred feet away by the island that the shoals have formed around.
Here is where I get critical. My wife is giving me orders and I got irritated. My short coming. She had stepped up as the lead but I am capable in my own right. My ego could have caused problems if I had not realized how this needed to play out. I was also irritated that I was the last to the scene but the first to the victim. (This was my personal emotion, in a situation like this people need to remain in their comfort zone.) This is because I tend to react and studied the scene as I approached. I also approached from the rear left announcing my presence and came into the victims view before reaching out to touch him. This was for my safety in case there was ill intent on his part. Stay out of the victims striking range while you assess the situation.
Okay, the victim is conscious but not responding to us. He is sobbing and was obviously cold and not shivering and his skin was pale. Hypothermia!
My wife is on the radio with the coast guard and someone is on the way to get help from the marina. Someone has joined me on the shoal. I do not vocalize my plan and leave the victim to get my emergency kit. The other person on the shoal does the same leaving the victim un-monitored. This is my fault. I should have said what I was doing and asked the other person to stay with the victim. When I got back in about 20 seconds with my kit the victim was laying on the ground but still sobbing. We get the emergency blanket around him as best we could. Had help not been just minutes away I had a ground cloth to move the victim onto.
Moments later the skiff from the marina arrived with the guy the victim had been out kayaking with. We get the victim up and onto the skiff while I am getting irritated with his "friend" who starts fussing with the kayak. The skiff pilot and I both yell at him to leave the kayak and get into the skiff. As I push them off I tell them I will tow the kayak over.
My wife informs the coast guard what is transpiring. Their ETA from the start of the request for help was 6 minutes. The skiff was on its way and I was halfway to the marina towing the victims kayak as the coast guard paused on the other side of the river turning off its lights. My wife said she was watching the time and it was exactly 6 minutes when the coast guard arrived. As I pulled up to the kayak launch with the victims kayak the EMTs were arriving at the marina.
From the time we arrived the victim was in the hands of definitive care in around 10 minutes. My wife and everyone in our group performed great. I have issues with some things about myself and I tend to place the same expectations I have for myself on others, Not a great personality trait.
Speculation time!!!! So, how did this situation happen?
My theory is based off different pieces of information I gathered during the crisis and from the guy from the marina kayak shack.
First the two guys left together. The victim had never kayaked before as stated by his friend that morning while talking to the guy at the kayak shack. The friend who went with the victim that morning and arrived on the skiff for the extraction had been back at the marina for at least a half an hour. The victim is not wearing shoes, they are in the kayak.
They had to paddle against the wind and current to get back and the tide was dropping and the wind was blowing slightly toward the shoals and the island they formed around.
The new paddler in his bath tub shaped 8 foot boat has gotten tired and is paddling inefficiently and is blown onto the shoals. His friend has paddled away ahead of him and does not notice. The guy takes off his shoes and gets out to get the kayak off the shoals. He is first shocked by the coldness of the water and the slippery rocks and falls down letting go of the boat. The boat now not weighted by the paddler blows out of reach. The paddler carries his paddle to the highest point. Probably called out to his friend who did not hear him. Other people kayaking passed him but he did not call out. Hypothermia can happen rapidly and he was in light cotton pants and a cotton hoodie. Not appropriate dress for the water, especially in cooler weather.
We are just glad there was not a headline of "Kayaker Dies on the Potomac". Paddling around i a rec kayak does not make you a kayaker. You are a rec boater. I always hated when they would report "Rock Climber Falls at Great Falls" and it turns out it was someone with no equipment or experience climbing around on the rocks.
Okay, story over.
Monday, September 7, 2015
Online Resources to Plan Your Next Kayak Outing
So, you are planning that next kayak trip. This is longer than just paddling a couple miles along the shore in your usual location. You want to plan your route but you do not have all the cool and expensive mapping software. Where do you start?
First you may want a chart of the area to print out and have with you. All the NOAA charts are available free online in PDF Format.
http://www.charts.noaa.gov/InteractiveCatalog/nrnc.shtml
There is also an online chart viewer that can be used to plan your route and export it to your GPS.
http://earthnc.com/chartviewer/
Play around with this site and see all the information is has to offer.
Next you need to plan and know what to expect from the tides, currents and weather. I personally turn to NOAA for this information also. Other sites have this information but their data source is NOAA.
Tides and Currents
https://tidesandcurrents.noaa.gov/products.html
This site is not as user friendly as one would hope but if you poke around for a bit you will find it has all the information you want. It has loads of data including graphs of water temperatures, currents and wave averages over time.
Another place for tide information is http://tbone.biol.sc.edu/tide/
Then there is the National Weather Service provided by NOAA. I like to get and hour by hour report in tabular format and include wave prediction.
http://www.nws.noaa.gov/om/marine/home.htm
Then there is the information available from the buoy stations. http://www.ndbc.noaa.gov/
The National Data Buoy Center is a great resource for wind, waves and water temperature. You can also reach this site from the forecast page in the NWS Marine forecast page.
You will also want wave and surf information if you are paddling near the mouth of a bay or in the ocean. These are two sites I like to use.
http://www.surfline.com/
http://www.stormsurf.com/
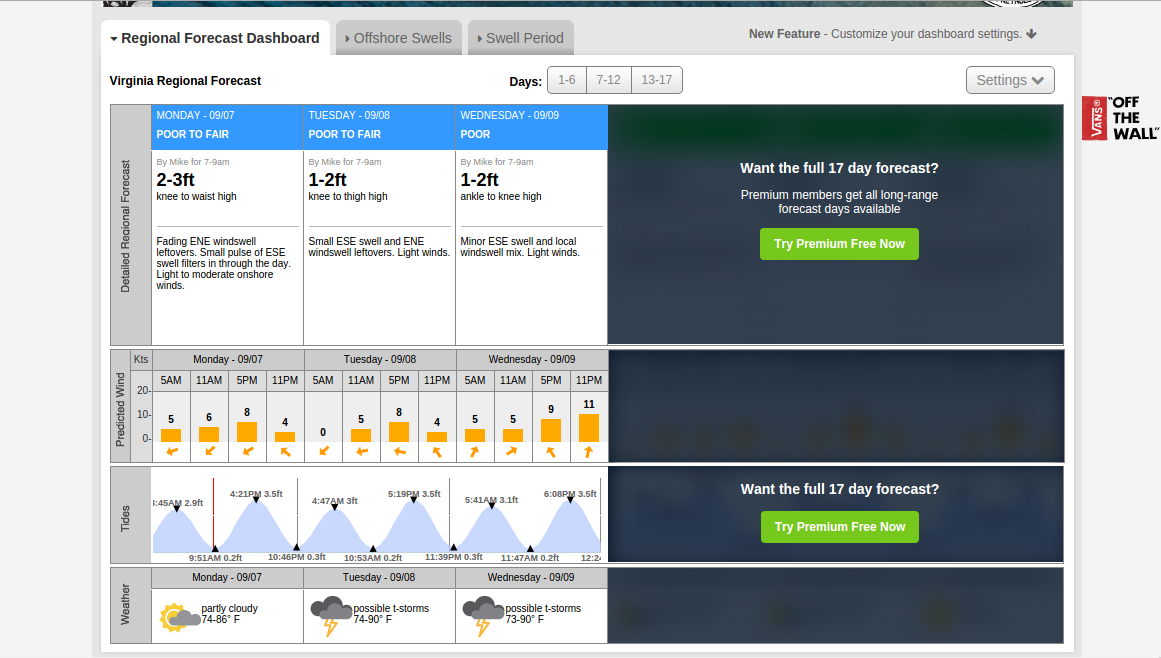
Click around on StormSurf because it contains a lot of data. In the image above you can see the link tabs above the graphic, these will change the display map to show you all kinds fo data about the area.
Next you will want to have a float plan that you give to a family member or friend in the event you do not arrive back when you are expected.
Here are links to some example float plans.
http://floatplancentral.cgaux.org/
http://www.exploreri.org/documents/float_plan-seakayakermag.pdf
http://www.nps.gov/calo/planyourvisit/upload/Canoe-and-Kayak-Float-Plan_rev04-13.pdf
You should find one that works for you and make filing a float plan a habit even on short trips.
To make life even easier in this age of technology you can file a float plan from your smart phone.
Float Plan Apps
http://www.uscg.mil/mobile/
http://www.americancanoe.org/?page=PaddleReady
http://www.thefloatplanapp.com/ - Android version still under development
And just a nice general reference for all things sea kayaking you might want to check out the "Online Sea Kayaking Referance Book"
Hopefully you find som of these sites useful. Pleas share your favorite kayaking trip prep sites in the comments.
First you may want a chart of the area to print out and have with you. All the NOAA charts are available free online in PDF Format.
http://www.charts.noaa.gov/InteractiveCatalog/nrnc.shtml
There is also an online chart viewer that can be used to plan your route and export it to your GPS.
http://earthnc.com/chartviewer/
Play around with this site and see all the information is has to offer.
Next you need to plan and know what to expect from the tides, currents and weather. I personally turn to NOAA for this information also. Other sites have this information but their data source is NOAA.
Tides and Currents
https://tidesandcurrents.noaa.gov/products.html
This site is not as user friendly as one would hope but if you poke around for a bit you will find it has all the information you want. It has loads of data including graphs of water temperatures, currents and wave averages over time.
Another place for tide information is http://tbone.biol.sc.edu/tide/
Then there is the National Weather Service provided by NOAA. I like to get and hour by hour report in tabular format and include wave prediction.
http://www.nws.noaa.gov/om/marine/home.htm
Then there is the information available from the buoy stations. http://www.ndbc.noaa.gov/
The National Data Buoy Center is a great resource for wind, waves and water temperature. You can also reach this site from the forecast page in the NWS Marine forecast page.
You will also want wave and surf information if you are paddling near the mouth of a bay or in the ocean. These are two sites I like to use.
http://www.surfline.com/
http://www.stormsurf.com/
Click around on StormSurf because it contains a lot of data. In the image above you can see the link tabs above the graphic, these will change the display map to show you all kinds fo data about the area.
Next you will want to have a float plan that you give to a family member or friend in the event you do not arrive back when you are expected.
Here are links to some example float plans.
http://floatplancentral.cgaux.org/
http://www.exploreri.org/documents/float_plan-seakayakermag.pdf
http://www.nps.gov/calo/planyourvisit/upload/Canoe-and-Kayak-Float-Plan_rev04-13.pdf
You should find one that works for you and make filing a float plan a habit even on short trips.
To make life even easier in this age of technology you can file a float plan from your smart phone.
Float Plan Apps
http://www.uscg.mil/mobile/
http://www.americancanoe.org/?page=PaddleReady
http://www.thefloatplanapp.com/ - Android version still under development
Hopefully you find som of these sites useful. Pleas share your favorite kayaking trip prep sites in the comments.
Friday, August 28, 2015
The certification crisis. Is certification necessary?
We all know that the popularity of sea kayaking and expedition kayaking is waning. There is much debate about why this is happening. And like everyone else, I have my theories and opinions. First is elitists and safety wonks that populate the clubs and believe they are the only one that know how to kayak. The second is the rampant growth and push towards certification. Or maybe the ease and low entry of SUP.
I believe that there is much you need to learn as you advance to open water kayaking. I have always been the kind of guy who jumps in with both feet and will learn what I need to know through experience. I believe that most kayakers should learn this way. In my opinion this kind of learning will stick with you. Experiential learning is one of the best forms and I don't mean see then do method of teaching. Get a boat, life vest and paddle and go for it. That is how the first kayakers did it.
Now don't get me wrong certification is not a bad thing in and of itself. But just to kayak you do not need certification. I became an instructor for a good reason, my wife wanted me to do it. With assessments based on a standard scale you can judge if a person should be capable of a given paddle. Yet, there are clubs that have there own courses and if you take their course then you are golden whether you actually absorbed the knowledge or not. So maybe a standardized assessment is not a bad thing. Hard call.
If you paddle in a reservoir or a calm lake or a slow moving stream, chances are you do not need classes and certification. Now this is assuming you are not a dumb ass and use common sense. Lets face it, you can not protect people from themselves.
So, I was going somewhere with this. Now where was I going?
Oh, I remember. Elitists and safety wonks and certification. With clubs you meet all kinds of people and like any group there are those that can do, those that talk, those that judge and then there are the people having fun. It just appears that in these clubs there are a vocal few that think they know all about safety and they set stupid rules and basically drive the fun people away. It happens in all groups not just kayaking.
With our club my standard for people is, be able to get in your boat have an idea of how to paddle straight and wear your PFD properly at all times on the water. Now lets paddle and see the wildlife. If the leader and assistants have some assisted rescue skills and you lead with common sense it will be a safe fun trip. Some clubs harp on wearing a spray deck. Really? I am not taking a club paddle into 2 foot waves, that is for vetted peer paddles.
Lets not get bogged down with rules that don't make sense. The first group I paddled with had a must have list of equipment to paddle with them, including a throw bag, for flat water paddles.
Lost my way again. Can't keep my train of thought from derailing.
People want to paddle with other people. So, they join clubs and are met with elitists and rules that make no sense so they quit the sport. Or they are told they need this class or that class and quit. All they really need is a kayak, paddle, PFD and water appropriate clothing. The rest will come. If they enjoy what they are doing they will want to learn and improve or just stay at the level they are and enjoy the water. And both are acceptable paths as far as I am concerned.
So, in conclusion don't be a safety wonk and don't push the certification nonsense. People will learn at their pace in the way they choose and to an extent they choose. Wow, that was a long road to say so little.
Certification is not killing the sport. The business of certification might. Forcing certification to buy or rent a kayak will kill it. I think like everything else the over obsessed safety culture has created a generation of risk adverse people. That my have contributed to the decline. And the elitists and safety wonks are taking the fun out of it. Not all perceived dangers are valid dangers. Lets let people enjoy kayaking and learn as they go. Don't push certification or enforce rules and equipment requirements that are just not needed.
Oh wait.... I was at an end. OK, I am stopping now.
Tuesday, May 26, 2015
My Vegvísir patch. Now I will never get lost.
I finally sewed my Vegvísir patch onto one of my PFDs. If you know me at all you know that I studied Norse and early Germanic mythology and I thought this was kind of fitting for a PFD. My wife bought the patch for me.
The Vegvísir is also known as the Viking or Icelandic compass.
The symbol is attested in the Huld Manuscript, collected in Iceland by Geir Vigfusson in 1860 (but consisting of material of earlier origin). A leaf of the manuscript provides a drawing of the Vegvísir symbol, giving its name, and, in prose, declaring that "if this sign is carried, one will never lose one's way in storms or bad weather, even when the way is not known".
It is said to be associated to Ægir.
In Norse mythology, Ægir (Old Norse "sea") is a sea jötunn associated with the ocean. The Jötnar are a mythological race that live in Jötunheimr, one of the nine worlds of Norse cosmology.
The Vegvísir is also known as the Viking or Icelandic compass.
The symbol is attested in the Huld Manuscript, collected in Iceland by Geir Vigfusson in 1860 (but consisting of material of earlier origin). A leaf of the manuscript provides a drawing of the Vegvísir symbol, giving its name, and, in prose, declaring that "if this sign is carried, one will never lose one's way in storms or bad weather, even when the way is not known".
It is said to be associated to Ægir.
In Norse mythology, Ægir (Old Norse "sea") is a sea jötunn associated with the ocean. The Jötnar are a mythological race that live in Jötunheimr, one of the nine worlds of Norse cosmology.
Wednesday, April 8, 2015
Practice Day on the Occoquan Reservoir
On Tuesday we headed out on the Occoquan Reservoir form Fountainhead Regional Park.
We paddled to an area we call fall out of your boat cove. It has a gravel slope going into the water up to about chest deep. This makes an excellent area to stand and help people with their balance brace and such.
We feel that you should take a day every few weeks to just spend time practicing paddle strokes and braces and rescues. Tuesday was a perfect day for it. It was overcast and about 64 degrees when we got on the water. The water temperature was 56 degrees so not too cold to hang out in a drysuit.
We enjoy the calm waters of the reservoir.
We played around with strokes on the way to the cove and while I was goofing around I went over. At this point I discovered that I could not roll with my pogies. The pogie on the sweep hand takes in water at the cuff causing drag and stalling my roll. First time I tried to roll while wearing pogies. You learn things about your equipment when you take a practice day. My wife was kind enough to give me an assisted rescue.
After this we made it over to the cove. I was not wearing my neoprene cap and got a little brain freeze while hanging upside down under my boat. Dress for the water!
Then once at the cove we both spent time in and out of our boats playing around.
It was an excellent few hour on the water.
We paddled to an area we call fall out of your boat cove. It has a gravel slope going into the water up to about chest deep. This makes an excellent area to stand and help people with their balance brace and such.
We feel that you should take a day every few weeks to just spend time practicing paddle strokes and braces and rescues. Tuesday was a perfect day for it. It was overcast and about 64 degrees when we got on the water. The water temperature was 56 degrees so not too cold to hang out in a drysuit.
We enjoy the calm waters of the reservoir.
We played around with strokes on the way to the cove and while I was goofing around I went over. At this point I discovered that I could not roll with my pogies. The pogie on the sweep hand takes in water at the cuff causing drag and stalling my roll. First time I tried to roll while wearing pogies. You learn things about your equipment when you take a practice day. My wife was kind enough to give me an assisted rescue.
After this we made it over to the cove. I was not wearing my neoprene cap and got a little brain freeze while hanging upside down under my boat. Dress for the water!
Then once at the cove we both spent time in and out of our boats playing around.
It was an excellent few hour on the water.
Monday, April 6, 2015
Adjustable Contact/Short Tow Line Revisited
Below is a video of the adjustable short tow line in use. Since the person in the "victim kayak" was shooting the video, they are not laying on the "rescue kayak" so the video is not great. It shows that it is adjustable quickly and that it can be adjusted and released in gloves.
If you have not seen my contact tow blog yet, you can read it here. Then you will know to what I am referring.
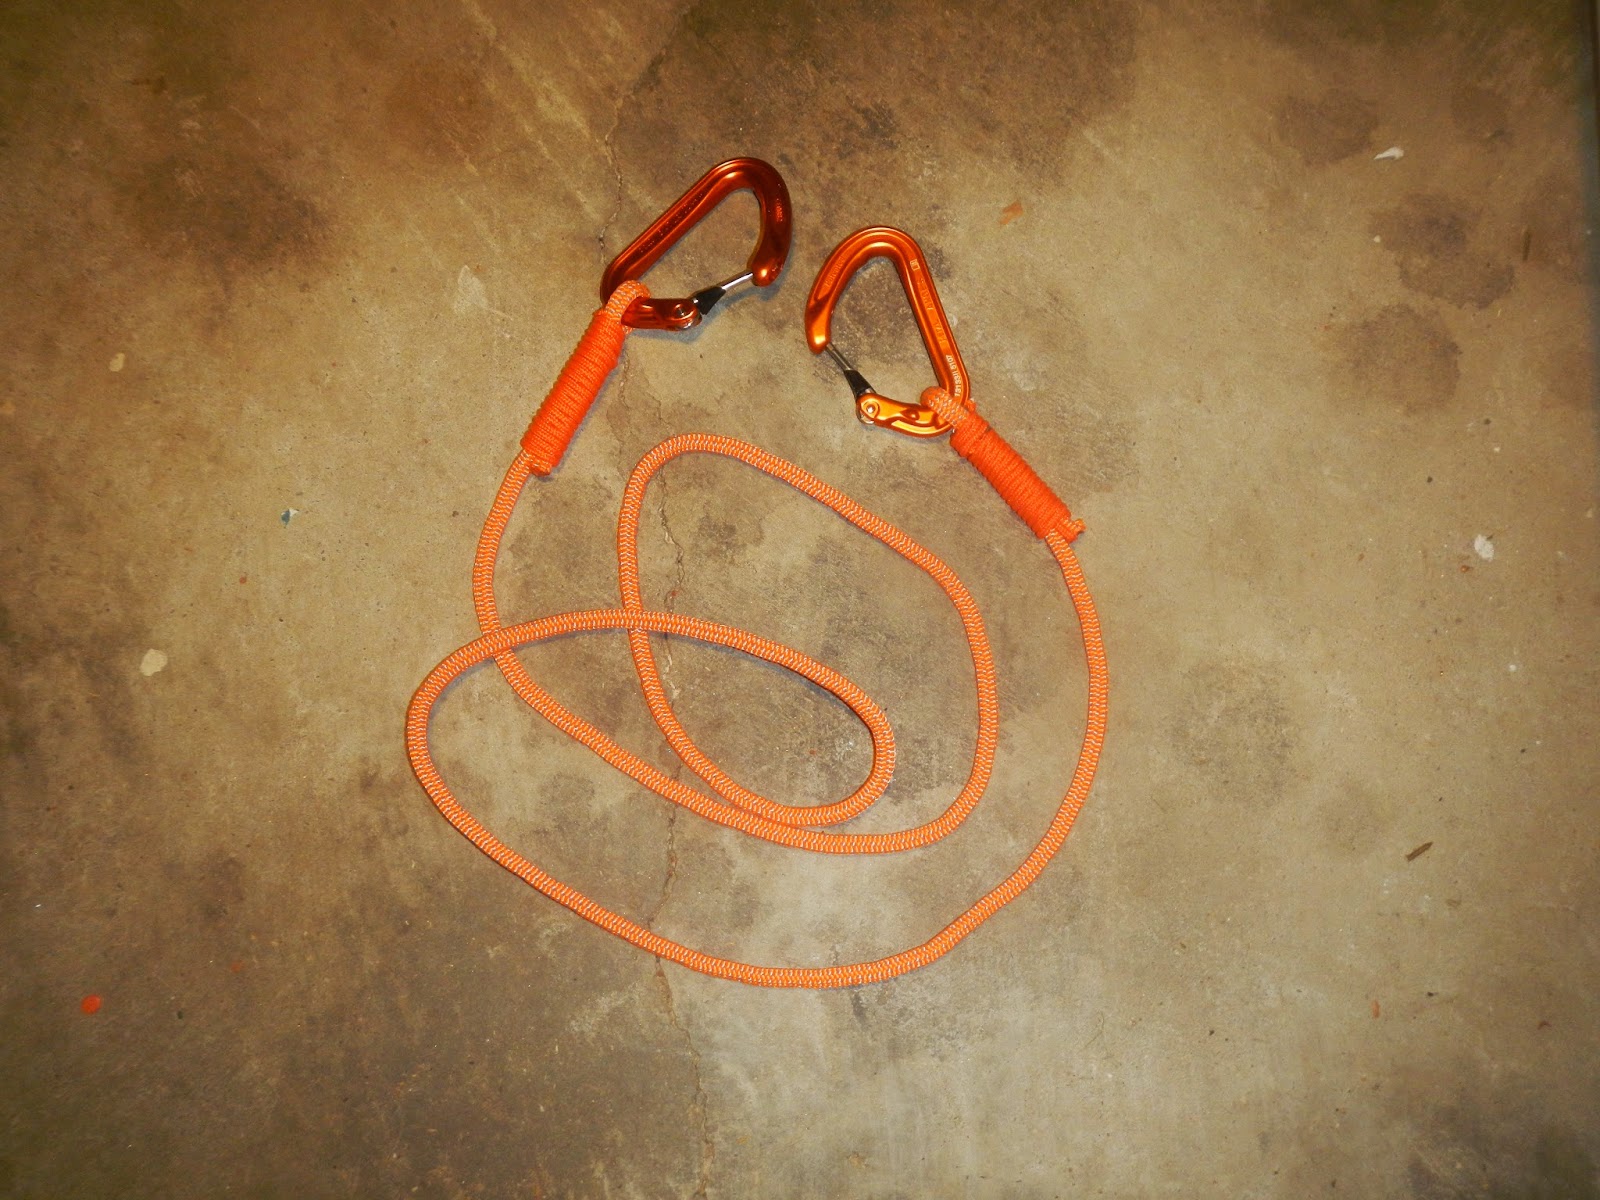
I like to use high contrast and reflective line for this application so it is easy to see and recognize. I use 6mm cord for the low line and 3 or 4mm for the prusik. The one shown here is 4mm prusik. I used leftover deck rigging line.
This is the rope I use.
http://shop.blackjackmountainoutfitters.com/BlueWater-Ropes-6mm-NITELINE-by-the-Foot-500600REF.htm
And for the prusik.
http://shop.blackjackmountainoutfitters.com/BlueWater-Ropes-3mm-NITELINE-by-the-Foot-500300.htm
If you have not seen my contact tow blog yet, you can read it here. Then you will know to what I am referring.
I like to use high contrast and reflective line for this application so it is easy to see and recognize. I use 6mm cord for the low line and 3 or 4mm for the prusik. The one shown here is 4mm prusik. I used leftover deck rigging line.
This is the rope I use.
http://shop.blackjackmountainoutfitters.com/BlueWater-Ropes-6mm-NITELINE-by-the-Foot-500600REF.htm
And for the prusik.
http://shop.blackjackmountainoutfitters.com/BlueWater-Ropes-3mm-NITELINE-by-the-Foot-500300.htm
They also have this line in 4mm size which I use for deck line.
Now the Video.
Remember that this video is to show how easy the tow can be adjusted and is not an example of a good or safe tow.
Saturday, March 28, 2015
Contact tows and short tow lines.
This will be my first post on tows. There will be one or two more to follow.
Tows are an over looked part of kayak skills every kayaker should know. The ability to conduct a safe and proper tow requires the proper equipment and proper training. I am not going to try and teach towing in this post, instead I am going to share some thoughts and ideas.
The traditional contact tow can either be a push or a pull tow, where the person being towed is leaning on the front or back deck of the kayak of the person doing the towing.
Tows are an over looked part of kayak skills every kayaker should know. The ability to conduct a safe and proper tow requires the proper equipment and proper training. I am not going to try and teach towing in this post, instead I am going to share some thoughts and ideas.
The traditional contact tow can either be a push or a pull tow, where the person being towed is leaning on the front or back deck of the kayak of the person doing the towing.
| http://kask.org.nz/wp-content/uploads/towingDiag3.jpg |
A popular variation to this is to combine a short tow line for added control and security. Gordon Brown gives a good example in this video.
Now seeing this method of making a short tow/contact tow system I decided to make one for myself.
I played around with this for a season. It is quick and efficient. The real drawback is limited adjustability and the lack of ability to quickly release it under tension.
Case in point; You use this tow system to retrieve someones kayak in wave conditions. A wave suddenly forms to the far outside of the break and you are in the soup and the boat you are towing is full of water and dragging you back. Quick another wave is about to break.... How are you getting free?
My wife bought this short tow/contact tow system.
This system is adjustable and has a snap buckle for a quick release. Issues, the buckle is hard to unsnap with gloves and also when under load. There is also extra strap flopping around if you have it connected across your deck for easy access. This can be a problem when you are rolling in the surf and trying to grab your spray skirt pull tab when you can not see. This story was relayed to me after it happened to someone.
Then I saw this version of the short tow with a quick release shackle.
It can be used and stored on your deck as shown in the Gordon Brown video but you have to approach and clip from a set side or fumble around with the system to switch sides. I like this idea but it could use some improvements.
I have also seen short tow lines attached to the deck line with an Evenk/Siberian Hitch. A useful option in a pinch but you need to know how it is done and be well practiced. Also it will take precious time to set up in a rescue situation.
Being a climber this is not much of an issue but what if we could use an adjustable system with a quick release shackle that can be attached to the deck line and ready for use.
I like this solution. I tied it up yesterday and can not wait to put it to use.
The line is connected to the quick release shackle via a prusik loop. This is an attachment hitch everyone should know.
The prusik can be slid to any point along the line but will lock in place under tension. There is a limiting knot at the end of the line to prevent sliding the prusik all the way off.
I made monkeys fist on my quick release pull to make it easy to use with gloves. You can use it on the same side as attached or across deck. On the boat in the image I have my deck line adjustment in front of my cockpit so the shackle can not be moved from side to side. On my other kayak the deck line adjustment is at the bow so this is not an issue.
There are pros and cons to all these systems but this should give you some food for thought. Try different systems and find the one that works best for you.
Friday, January 23, 2015
Trail Sites on the internet and tracking apps for your Smart Phone
Several years ago I started using Wikiloc to save my GPS tracks. Then later I created an EveryTrail account but did not use it much. I returned to it recently and found the interface improved and it had the guide creation feature. I really started using it and moved all my tracks over to the site. It has now been down for a week. This really sucks because I have started using my smart phone and BackCountry Navigator that has a feature to upload directly to EveryTrail. I also installed the EveryTrail app on my phone and was about to purchase a pro account.
Now, I have another account with AllTrails. I believe this one will stay around since it is run by National Geographic. Still not sure how much I will like it. EveryTrail had some nice features like guide creation. Wikiloc's interface has become dated and I have always had issues with adding photos with geo location metadata. They all have phone apps with various uses and the ability to record tracks with your phones GPS. I prefer to use Backcountry Navigator to record my tracks for a many reasons. The one that stands out the most is the ability to download NOAA charts to the phone so I can navigate when I do not have cell service. I still keep a chart on my deck along with a compass and a regular GPS but having a nautical chart on your phone that you can compare with your deck chart makes knowing your location and taking a bearing super simple.
So, what tech do you use for navigation and sharing your trails? Leave a comment ant let me know. I am always looking to test new apps and gadgets.
If you know what happened to the EveryTrail site let me know. I can not find any information on the interwebs.
![]() |
| A track screenshot from Backcountry Navigator |
Monday, December 15, 2014
A windy afternoon paddle and test of my new dry suit
Yesterday we went for a paddle from Pohick Regional Park. We just wanted to get out and stretch the muscles. Forecast was for winds at around 12mph so we knew based on the tide we would find both calm and rough water to play in. I also wanted to swim test my "new" dry suit.
Here is the track.
Here is the track.
And a few photos of the wife.
Sunday, December 7, 2014
Leesylvania / Occoguan Bay Paddle
On Saturday the wife and I went for a nice short paddle from Leesylvania State Park to Great Marsh which is part of the Mason Neck National Wildlife Refuge. It was a pleasant day with a temperature of around 50 degrees Fahrenheit and a water temperature of around 46. The paddle started out with scattered fog but as we were heading back the visibility dropped to a mile or less. We checked our bearing before we lost sight of land. It made for a nice paddle and there was no boat traffic.
And here are a few photos of or paddle last Saturday.
![]() |
| Our track for the paddle on a beautiful foggy and rainy Saturday. |
![]() |
| Kayaks waiting for launch |
![]() |
| The Lorax's Wife playing around. |
![]() |
| Another shot of The Lorax's Wife. |
![]() |
| One of the sever Bald Eagles we spotted. |
![]() |
| Guess the eagle got camera shy. |
![]() |
| On our way back to the put in the fog was thick. Visibility was only about a mile. |
Tuesday, November 11, 2014
Deck rigging
So, this is what I have to say about deck rigging. These are my opinions and I am no expert.
First deck rigging is a personal thing. You should attach your deck rigging in a style and pattern that works best for you. You should have enough deck line to enable your kayak to be easily attached to for towing a line a location for you to be able to easily hold onto your kayak while swimming. You should also have line in the correct places to assist you in re-entry. In my opinion this means lines completely around the front and back of the kayak.
As for bungee you need enough to keep your stuff on your deck if you put stuff on your deck. I have gotten to the point where I like to keep my deck fairly clean, especially the rear deck. I need bungee for my spare paddle and my chart and maybe a water bottle. I keep my paddle float and bilge pump in my cockpit. The float goes behind the seat and the pump between the seat stabilizer and the side of the kayak, when possible.
I prefer to use Bluewater 4MM NITELINE™ REFLECTIVE CORD. It comes in several colors and it is durable and strong. Bungee is so generic and easy to find in a variety of colors. I have not found one that performs better than another.
When I bought my Point 65N Whiskey 16 it had the factory deck rigging.
As you can see the rigging is basic black without reflective properties. The line does not wrap completely around the front deck, there is a gap at the front hatch. There was only a small X of bungee on the front deck and a single piece on the front near the compass mount. In replacing it, I rigged it to my liking.

As you can see the deck line goes all the way around the front deck. The rear rigging is pretty much the same as the original rigging because of the hatches. Where the original deck line came to a point behind the front hatch is now bungee. Better for keeping my paddle on the front deck.
Below you can see that the back rigging at the cockpit area is tied off using a bowline with a Yosemite finish and a double fisherman. This allows for easy adjustment of the line.
On this kayak I tied off the front deck line in front of the cockpit. One side is a bowline and the loop is attached to the other rope as a square knot and a double fisherman. I chose this connection setup because it allows for adjustment and the knots are easily undone. I hate the location of the connection. The knots get in the way of the bungee when working with a chart. I prefer my adjustment knots at the bow of the kayak. You can not adjust your deck line alone on the water so there is really no need for it to be accessible from the cockpit. I will change this next time I replace the lines.
So, there are no major changes, just some modifications. Now the boat has deck line all around the front to make the kayak easier to hang on to and it has some additional bungee for convenience.
As for the adjustment/connection point for the deck line being in front of the cockpit, I did it that way because the original deck rigging was done that way but just with a pair of triple fisherman knots. This setup is common practice that has no real functionality. People will say it is for ease of adjustment when on the water but the two people I asked about it were unable to actually adjust their rigging this way while in the kayak. Your mileage may vary. It is all a matter of what you like and/or prefer.
Here you can see where I have the line adjustment/connection set to the front of my Point 65N XO. This is my preferred placement of the knot.
Now there is nothing in the way of my ability to use the cross deck bungee. Well, except for my contact tow line. We will discuss that later.
Also the red as well as the blue line are reflective.
Here you can see there is no knot in front of the cockpit. Using this setup you can still have the ability to adjust your deck line and with the aid of another kayaker it can be adjusted while on the water if needed.
Your deck lines should be tight enough that they will not easily get snagged but loose enough to be able to get your fingers around the line.
My wife had me redo the deck rigging on her NDK Romany Surf.
Things she did not like about the way it was rigged was, no adjustment points for the deck lines. They ere just attached with knots at the guides. Second, she did not like just having 3 straight bungees on the front deck.
A you can see the deck lines are stretched and sagging. It was also a braided cord that was rough and abraded. It was basic black and non reflective. If you have not noticed I like visibility. Reflective cord is only a few cents per foot more than regular deck line sold in most stores. I am surprised that more places do not carry it. I buy mine from a mountain rescue supply company. You can also buy it direct from Bluewater.
As you can see in this photo I did the bungee in a crisscross pattern on the front deck. My wife likes this better for securing things to the deck and keeping her charts in place.
When I did the back deck I extended the deck line at an angle across the deck behind the day hatch. This allows for mor line to grab on the back deck and it allowed me to be able to use my favorite connection and adjustment knot.
The adjustment and concretion knot for the front deck are at the front of the kayak. One of the people in our kayak group started telling her that this was wrong and should be redone.
There is one of them in every group who thinks they know it all and have no problem telling you that you are wrong. Don't listen to them. Do what works best for you and be ready to tell the know-it-all why it works for you and why it is just as safe and secure as the way they believe to be the only correct way to rig a kayak deck.

Keep in mind that every one has an opinion and opinions vary. Just understand what you are doing and be able to explain why you did it and be able to show that it does not hinder safety.
Safety is the reason for the deck lines in the first place.
And lastly a close up of my preferred adjustment and connection knot.
First deck rigging is a personal thing. You should attach your deck rigging in a style and pattern that works best for you. You should have enough deck line to enable your kayak to be easily attached to for towing a line a location for you to be able to easily hold onto your kayak while swimming. You should also have line in the correct places to assist you in re-entry. In my opinion this means lines completely around the front and back of the kayak.
As for bungee you need enough to keep your stuff on your deck if you put stuff on your deck. I have gotten to the point where I like to keep my deck fairly clean, especially the rear deck. I need bungee for my spare paddle and my chart and maybe a water bottle. I keep my paddle float and bilge pump in my cockpit. The float goes behind the seat and the pump between the seat stabilizer and the side of the kayak, when possible.
I prefer to use Bluewater 4MM NITELINE™ REFLECTIVE CORD. It comes in several colors and it is durable and strong. Bungee is so generic and easy to find in a variety of colors. I have not found one that performs better than another.
When I bought my Point 65N Whiskey 16 it had the factory deck rigging.
As you can see the rigging is basic black without reflective properties. The line does not wrap completely around the front deck, there is a gap at the front hatch. There was only a small X of bungee on the front deck and a single piece on the front near the compass mount. In replacing it, I rigged it to my liking.
Below you can see that the back rigging at the cockpit area is tied off using a bowline with a Yosemite finish and a double fisherman. This allows for easy adjustment of the line.
On this kayak I tied off the front deck line in front of the cockpit. One side is a bowline and the loop is attached to the other rope as a square knot and a double fisherman. I chose this connection setup because it allows for adjustment and the knots are easily undone. I hate the location of the connection. The knots get in the way of the bungee when working with a chart. I prefer my adjustment knots at the bow of the kayak. You can not adjust your deck line alone on the water so there is really no need for it to be accessible from the cockpit. I will change this next time I replace the lines.
So, there are no major changes, just some modifications. Now the boat has deck line all around the front to make the kayak easier to hang on to and it has some additional bungee for convenience.
As for the adjustment/connection point for the deck line being in front of the cockpit, I did it that way because the original deck rigging was done that way but just with a pair of triple fisherman knots. This setup is common practice that has no real functionality. People will say it is for ease of adjustment when on the water but the two people I asked about it were unable to actually adjust their rigging this way while in the kayak. Your mileage may vary. It is all a matter of what you like and/or prefer.
Here you can see where I have the line adjustment/connection set to the front of my Point 65N XO. This is my preferred placement of the knot.
Now there is nothing in the way of my ability to use the cross deck bungee. Well, except for my contact tow line. We will discuss that later.
Also the red as well as the blue line are reflective.
Here you can see there is no knot in front of the cockpit. Using this setup you can still have the ability to adjust your deck line and with the aid of another kayaker it can be adjusted while on the water if needed.
Your deck lines should be tight enough that they will not easily get snagged but loose enough to be able to get your fingers around the line.
Things she did not like about the way it was rigged was, no adjustment points for the deck lines. They ere just attached with knots at the guides. Second, she did not like just having 3 straight bungees on the front deck.
A you can see the deck lines are stretched and sagging. It was also a braided cord that was rough and abraded. It was basic black and non reflective. If you have not noticed I like visibility. Reflective cord is only a few cents per foot more than regular deck line sold in most stores. I am surprised that more places do not carry it. I buy mine from a mountain rescue supply company. You can also buy it direct from Bluewater.
As you can see in this photo I did the bungee in a crisscross pattern on the front deck. My wife likes this better for securing things to the deck and keeping her charts in place.
When I did the back deck I extended the deck line at an angle across the deck behind the day hatch. This allows for mor line to grab on the back deck and it allowed me to be able to use my favorite connection and adjustment knot.
The adjustment and concretion knot for the front deck are at the front of the kayak. One of the people in our kayak group started telling her that this was wrong and should be redone.
There is one of them in every group who thinks they know it all and have no problem telling you that you are wrong. Don't listen to them. Do what works best for you and be ready to tell the know-it-all why it works for you and why it is just as safe and secure as the way they believe to be the only correct way to rig a kayak deck.

Keep in mind that every one has an opinion and opinions vary. Just understand what you are doing and be able to explain why you did it and be able to show that it does not hinder safety.
Safety is the reason for the deck lines in the first place.
And lastly a close up of my preferred adjustment and connection knot.
Subscribe to:
Posts (Atom)