Showing posts with label deck rigging. Show all posts

Saturday, March 28, 2015

Contact tows and short tow lines.

This will be my first post on tows. There will be one or two more to follow.

Tows are an over looked part of kayak skills every kayaker should know. The ability to conduct a safe and proper tow requires the proper equipment and proper training. I am not going to try and teach towing in this post, instead I am going to share some thoughts and ideas.

The traditional contact tow can either be a push or a pull tow, where the person being towed is leaning on the front or back deck of the kayak of the person doing the towing.

http://kask.org.nz/wp-content/uploads/towingDiag3.jpg

A popular variation to this is to combine a short tow line for added control and security. Gordon Brown gives a good example in this video.


Now seeing this method of making a short tow/contact tow system I decided to make one for myself.
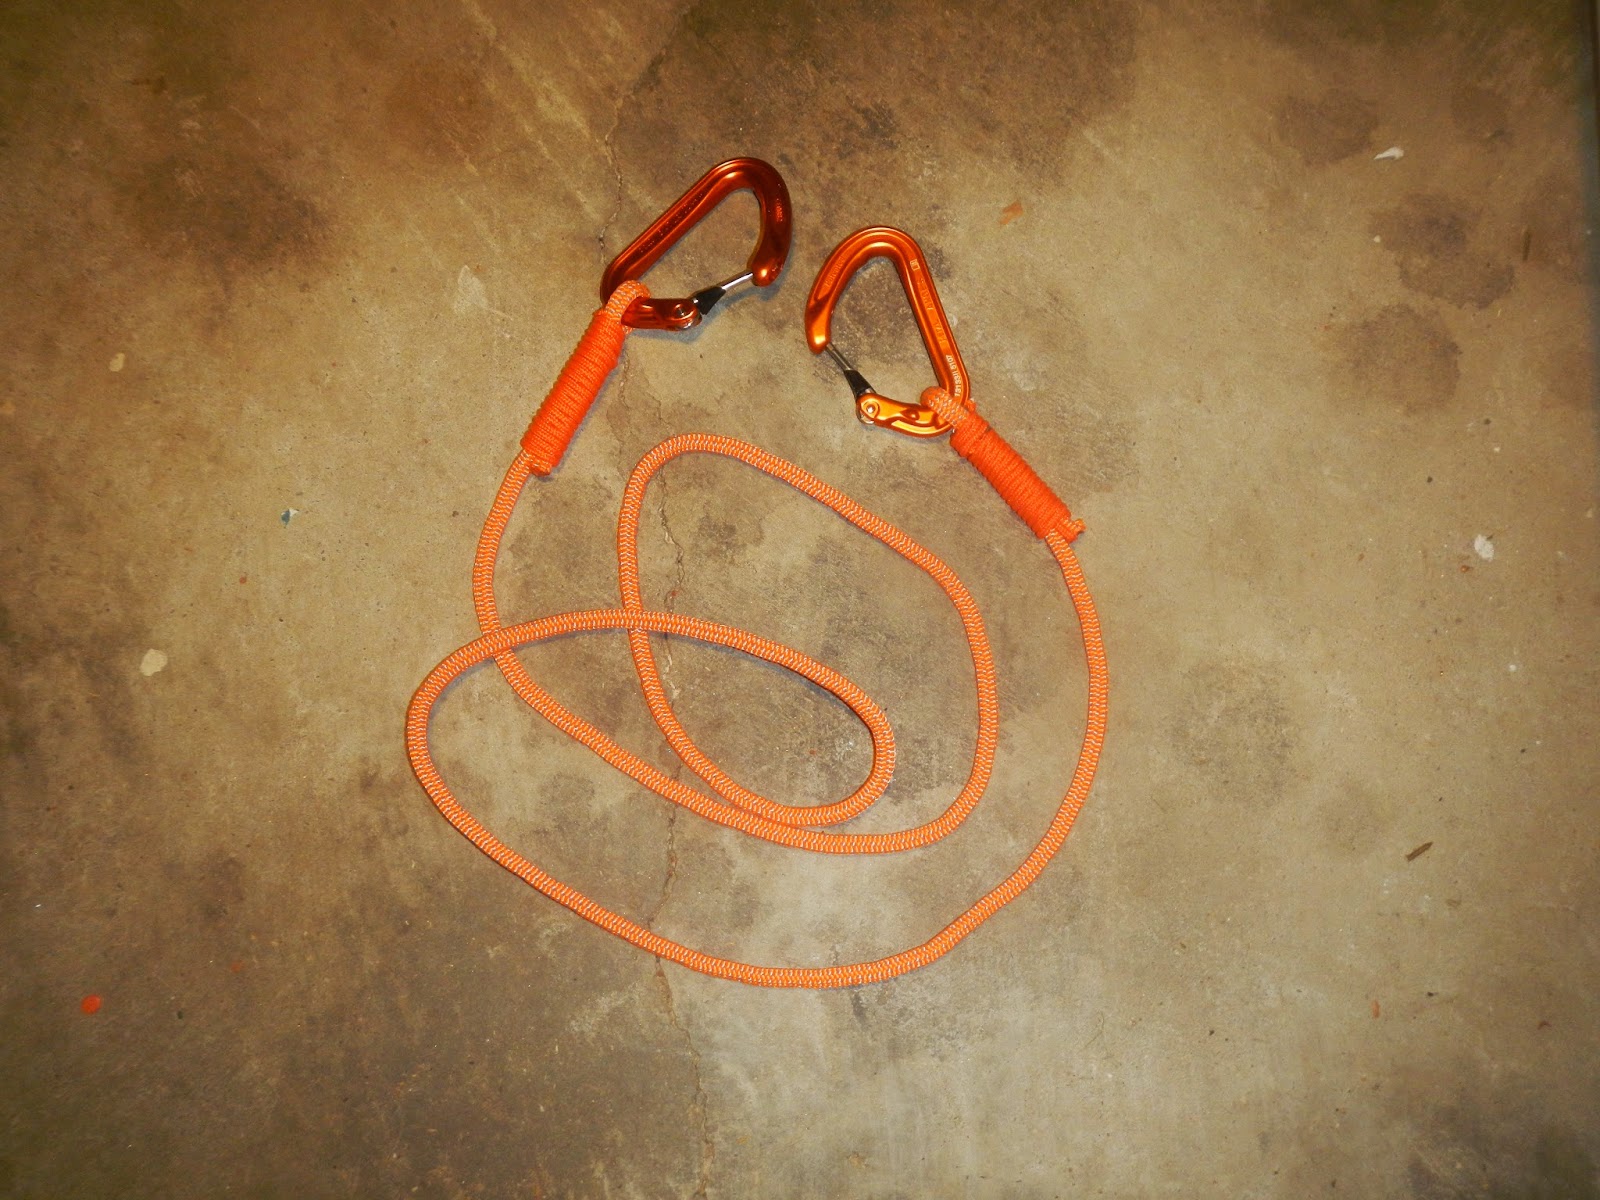

I played around with this for a season. It is quick and efficient. The real drawback is limited adjustability and the lack of ability to quickly release it under tension.

Case in point; You use this tow system to retrieve someones kayak in wave conditions. A wave suddenly forms to the far outside of the break and  you are in the soup and the boat you are towing is full of water and dragging you back. Quick another wave is about to break.... How are you getting free?

My wife bought this short tow/contact tow system.


This system is adjustable and has a snap buckle for a quick release. Issues, the buckle is hard to unsnap with gloves and also when under load. There is also extra strap flopping around if you have it connected across your deck for easy access. This can be a problem when you are rolling in the surf and trying to grab your spray skirt pull tab when you can not see. This story was relayed to me after it happened to someone.

Then I saw this version of the short tow with a quick release shackle.

https://blogger.googleusercontent.com/img/b/R29vZ2xl/AVvXsEiNSIr-hftwMKjgW9QK-ADqorRQYP45k5ZDPPwF_MvI2egkHUr9QRSpb0F9yFdIAxLWyPzI3Wq1SELdV09xVNdEXLacVtRl7GMkM86kpwCiHPYym9eVYR_UAHqT4VmcmzNdIoiJKKEamySS/s1600/P1013558.JPG

It can be used and stored on your deck as shown in the Gordon Brown video but you have to approach and clip from a set side or fumble around with the system to switch sides. I like this idea but it could use some improvements.

I have also seen short tow lines attached to the deck line with an Evenk/Siberian Hitch. A useful option in a pinch but you need to know how it is done and be well practiced. Also it will take precious time to set up in a rescue situation.

https://blogger.googleusercontent.com/img/b/R29vZ2xl/AVvXsEjvgK5-INlJq58ZJi5SjsFuLuTfERZxiW50TOiv3HbrTKvj7mqOg0v2X3vBRQ3ATgY3_ZzsvJ1Q3zPsIUFCVzd9dHXnnFzUjgsVFmiYXK7cKRsxkRL6KkBGl87RkS3fFy-R9EJhiT2_tqH9/s1600/HH8.jpg


Being a climber this is not much of an issue but what if we could use an adjustable system with a quick release shackle that can be attached to the deck line and ready for use.

I like this solution. I tied it up yesterday and can not wait to put it to use.


The line is connected to the quick release shackle via a prusik loop. This is an attachment hitch everyone should know.


The prusik can be slid to any point along the line but will lock in place under tension. There is a limiting knot at the end of the line to prevent sliding the prusik all the way off.

I made monkeys fist on my quick release pull to make it easy to use with gloves. You can use it on the same side as attached or across deck. On the boat in the image I have my deck line adjustment in front of my cockpit so the shackle can not be moved from side to side. On my other kayak the deck line adjustment is at the bow so this is not an issue.

There are pros and cons to all these systems but this should give you some food for thought. Try different systems and find the one that works best for you.


Tuesday, November 11, 2014

Deck rigging

So, this is what I have to say about deck rigging.  These are my opinions and I am no expert.

First deck rigging is a personal thing. You should attach your deck rigging in a style and pattern that works best for you. You should have enough deck line to enable your kayak to be easily attached to for towing a line a location for you to be able to easily hold onto your kayak while swimming. You should also have line in the correct places to assist you in re-entry. In my opinion this means lines completely around the front and back of the kayak.

As for bungee you need enough to keep your stuff on your deck if you put stuff on your deck. I have gotten to the point where I like to keep my deck fairly clean, especially the rear deck. I need bungee for my spare paddle and my chart and maybe a water bottle. I keep my paddle float and bilge pump in my cockpit. The float goes behind the seat and the pump between the seat stabilizer and the side of the kayak, when possible.

I prefer to use Bluewater 4MM NITELINE™ REFLECTIVE CORD. It comes in several colors and it is durable and strong. Bungee is so generic and easy to find in a variety of colors. I have not found one that performs better than another.

When I bought my Point 65N Whiskey 16 it had the factory deck rigging.


As you can see the rigging is basic black without reflective properties. The line does not wrap completely around the front deck, there is a gap at the front hatch. There was only a small X of bungee on the front deck and a single piece on the front near the compass mount. In replacing it, I rigged it to my liking.


 As you can see the deck line goes all the way around the front deck. The rear rigging is pretty much the same as the original rigging because of the hatches. Where the original deck line came to a point behind the front hatch is now bungee. Better for keeping my paddle on the front deck.

Below you can see that the back rigging at the cockpit area is tied off using a bowline with a Yosemite finish and a double fisherman. This allows for easy adjustment of the line.


On this kayak I tied off the front deck line in front of the cockpit. One side is a bowline and the loop is attached to the other rope as a square knot and a double fisherman. I chose this connection setup because it allows for adjustment and the knots are easily undone. I hate the location of the connection. The knots get in the way of the bungee when working with a chart. I prefer my adjustment knots at the bow of the kayak. You can not adjust your deck line alone on the water so there is really no need for it to be accessible from the cockpit. I will change this next time I replace the lines.

So, there are no major changes, just some modifications. Now the boat has deck line all around the front to make the kayak easier to hang on to and it has some additional bungee for convenience.

As for the adjustment/connection point for the deck line being in front of the cockpit, I did it that way because the original deck rigging was done that way but just with a pair of triple fisherman knots. This setup is common practice that has no real functionality. People will say it is for ease of adjustment when on the water but the two people I asked about it were unable to actually adjust their rigging this way while in the kayak. Your mileage may vary. It is all a matter of what you like and/or prefer.


Here you can see where I have the line adjustment/connection set to the front of my Point 65N XO. This is my preferred placement of the knot.

Now there is nothing in the way of my ability to use the cross deck bungee. Well, except for my contact tow line. We will discuss that later.

Also the red as well as the blue line are reflective.

Here you can see there is no knot in front of the cockpit. Using this setup you can still have the ability to adjust your deck line and with the aid of another kayaker it can be adjusted while on the water if needed.

Your deck lines should be tight enough that they will not easily get snagged but loose enough to be able to get your fingers around the line.


 My wife had me redo the deck rigging on her NDK Romany Surf.

Things she did not like about the way it was rigged was, no adjustment points for the deck lines. They ere just attached with knots at the guides. Second, she did not like just having 3 straight bungees on the front deck.
A you can see the deck lines are stretched and sagging. It was also a braided cord that was rough and abraded. It was basic black and non reflective. If you have not noticed I like visibility. Reflective cord is only a few cents per foot more than regular deck line sold in most stores. I am surprised that more places do not carry it. I buy mine from a mountain rescue supply company. You can also buy it direct from Bluewater.

As you can see in this photo I did the bungee in a crisscross pattern on the front deck. My wife likes this better for securing things to the deck and keeping her charts in place.

When I did the back deck I extended the deck line at an angle across the deck behind the day hatch. This allows for mor line to grab on the back deck and it allowed me to be able to use my favorite connection and adjustment knot.

The adjustment and concretion knot for the front deck are at the front of the kayak. One of the people in our kayak group started telling her that this was wrong and should be redone.

There is one of them in every group who thinks they know it all and have no problem telling you that you are wrong. Don't listen to them. Do what works best for you and be ready to tell the know-it-all why it works for you and why it is just as safe and secure as the way they believe to be the only correct way to rig a kayak deck.


Keep in mind that every one has an opinion and opinions vary. Just understand what you are doing and be able to explain why you did it and be able to show that it does not hinder safety.

Safety is the reason for the deck lines in the first place.

And lastly a close up of my preferred adjustment and connection knot.