Wednesday, April 1, 2015

Composite Kayak repairs

There are many opinions on how to repair a composite kayak. I am going to give you my 2 cents.

You will hear people talk about polyester verses epoxy resin. When you get into these discussions there is one question you need to ask the person, "What are the differences between polyester and epoxy resin." If they can not give you a simple answer then they don't know and they are spouting off someone elses opinion. Stay away from vinyl ester resin. Most likely you will not find it in your local boating shop anyway.

Polyester resin has a forgiving temperature range for working with it. The catalyst to resin mixture is also forgiving and is not as exact as epoxy resin. Polyester has a higher shrinkage than epoxy. Polyester has a better UV tolerance than Epoxy. Polyester is less expensive and offers corrosion resistance. Polyester resins are fast curing but continue to cure for a long time. This is what causes the odd smell in your deck hatches. The resin will off gas for a while.

Epoxy resins cure harder and provide a stronger bond with the composite materials than polyester resins. Epoxy resins are less forgiving of temperature and need a fairly exact catalyst to resin ratio. Epoxy yellows with UV exposure. Epoxy is more expensive. Epoxy can bond well to polyester. Some gel coats will not adhere well over epoxy but epoxy over the gel coat during initial layup adheres well.

Most composite sea kayaks on the market will be polyester. Some carbon and carbon kevlar may be epoxy if they have a clear finish so you see the fabric layer then it is a safe bet it is polyester resin.

When patching cracks in fiberglass hulls I like to use epoxy and 2 layers of 3 mil glass in a cross pattern layup. This adds extra strength to the weakened area without to much build up.

On punctures I plug the inside with a small piece of foam with a release material covering it. Then a use a thin sheet of glass and polyester resin on the outside of the hole and keep it lower than the gel coat layer. after it has set I remove the foam plug and patch from the inside with epoxy and glass as above. This ensures that the polyester gel coat will adhere properly.

Almost all production kayaks have an outer gel coat layer for color and UV protection. This is usually the first part of the layup of the mold. Gel coat can be applied by a spray gun but usually the repair kits you will find at a boating or marine supply store will be a paste gel.

Please avoid using epoxy you get from Home Depot this is an adhesive, it will work to seal a crack or hole but it will also be a pain to fix later. Repair kits with pre measured epoxy and catalyst packets can be bought and it is just as quick to do a proper repair the first time as it is to fix the hole or crack with two part epoxy adhesive.

When patching a cracked or fractured gel coat it is best to remove all loose original gel coat. as seen in the photos below.

Busted gel coat from a collision with a rock 

Area after cutting away fractured gel coat

Polyester gel coat paste

Gel coat applied and covered with wax paper


Gel coat after sanding. Watch out for air bubbles.
Cleaned it up and added a little more gel coat and it was good as new.


Saturday, March 28, 2015

Contact tows and short tow lines.

This will be my first post on tows. There will be one or two more to follow.

Tows are an over looked part of kayak skills every kayaker should know. The ability to conduct a safe and proper tow requires the proper equipment and proper training. I am not going to try and teach towing in this post, instead I am going to share some thoughts and ideas.

The traditional contact tow can either be a push or a pull tow, where the person being towed is leaning on the front or back deck of the kayak of the person doing the towing.

http://kask.org.nz/wp-content/uploads/towingDiag3.jpg

A popular variation to this is to combine a short tow line for added control and security. Gordon Brown gives a good example in this video.


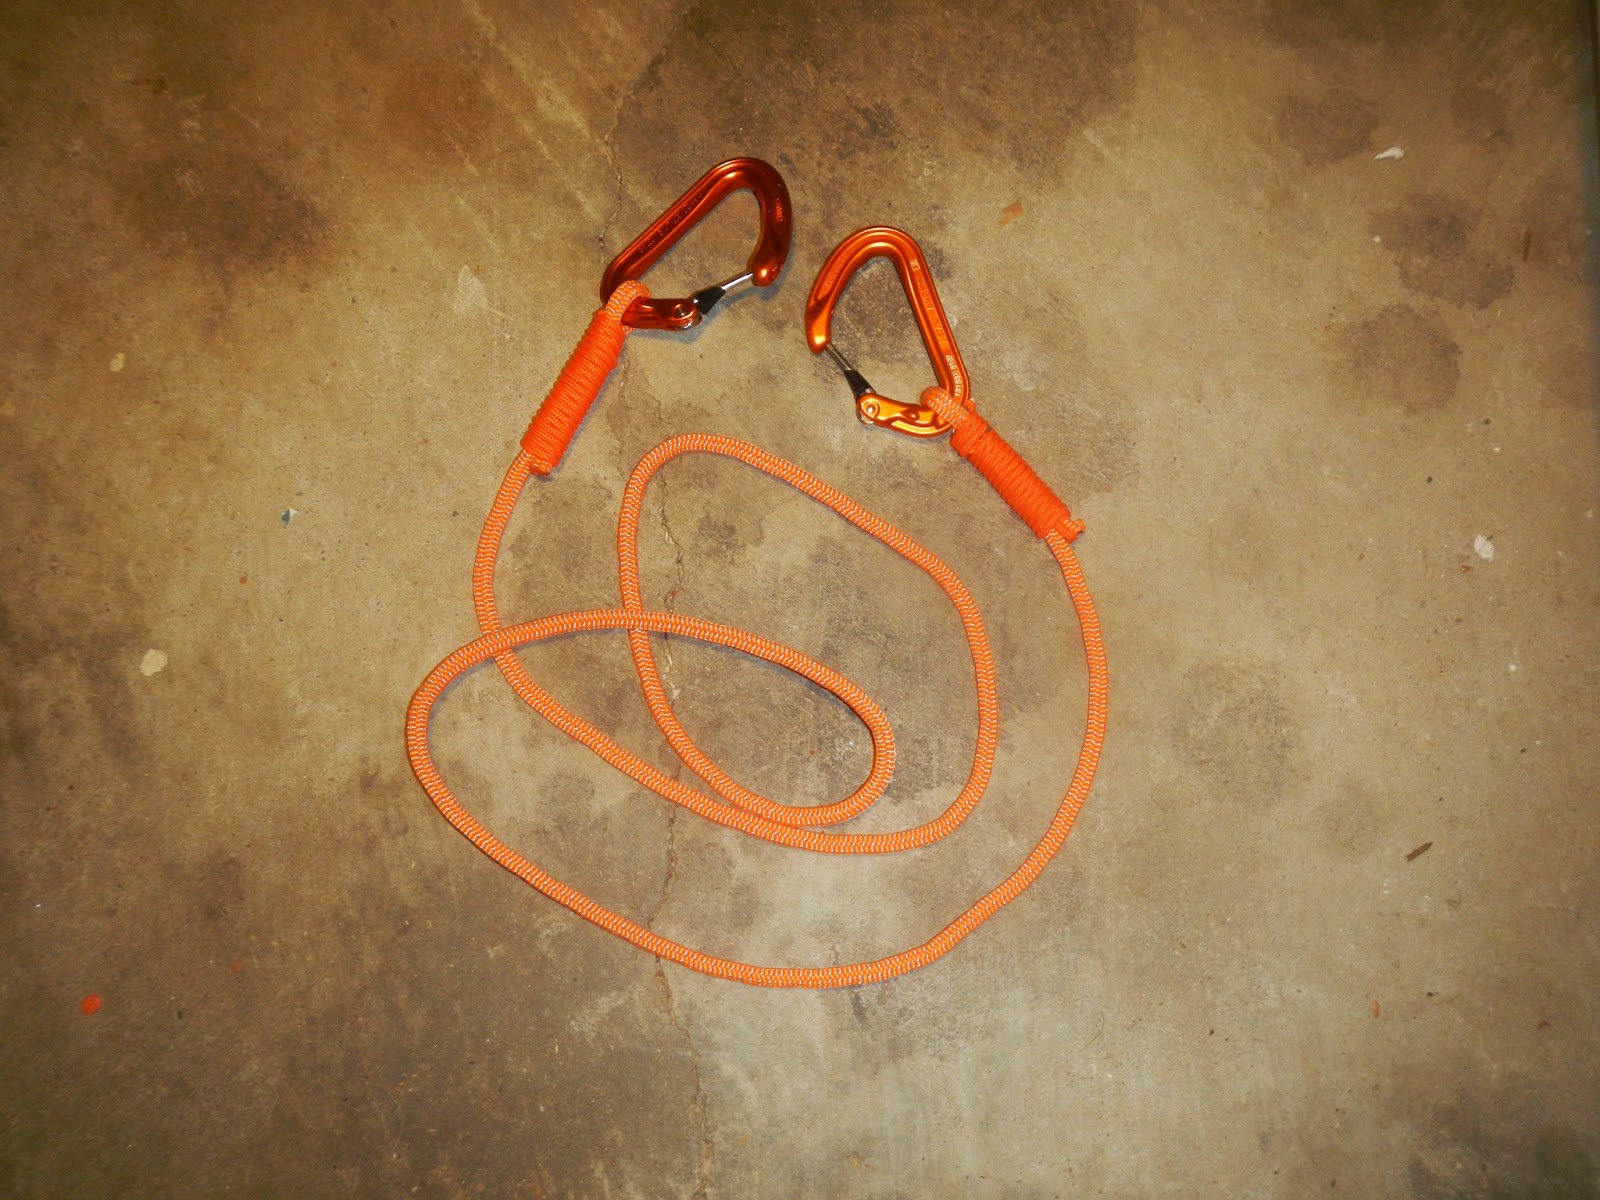
Now seeing this method of making a short tow/contact tow system I decided to make one for myself.


I played around with this for a season. It is quick and efficient. The real drawback is limited adjustability and the lack of ability to quickly release it under tension.

Case in point; You use this tow system to retrieve someones kayak in wave conditions. A wave suddenly forms to the far outside of the break and  you are in the soup and the boat you are towing is full of water and dragging you back. Quick another wave is about to break.... How are you getting free?

My wife bought this short tow/contact tow system.


This system is adjustable and has a snap buckle for a quick release. Issues, the buckle is hard to unsnap with gloves and also when under load. There is also extra strap flopping around if you have it connected across your deck for easy access. This can be a problem when you are rolling in the surf and trying to grab your spray skirt pull tab when you can not see. This story was relayed to me after it happened to someone.

Then I saw this version of the short tow with a quick release shackle.

https://blogger.googleusercontent.com/img/b/R29vZ2xl/AVvXsEiNSIr-hftwMKjgW9QK-ADqorRQYP45k5ZDPPwF_MvI2egkHUr9QRSpb0F9yFdIAxLWyPzI3Wq1SELdV09xVNdEXLacVtRl7GMkM86kpwCiHPYym9eVYR_UAHqT4VmcmzNdIoiJKKEamySS/s1600/P1013558.JPG

It can be used and stored on your deck as shown in the Gordon Brown video but you have to approach and clip from a set side or fumble around with the system to switch sides. I like this idea but it could use some improvements.

I have also seen short tow lines attached to the deck line with an Evenk/Siberian Hitch. A useful option in a pinch but you need to know how it is done and be well practiced. Also it will take precious time to set up in a rescue situation.

https://blogger.googleusercontent.com/img/b/R29vZ2xl/AVvXsEjvgK5-INlJq58ZJi5SjsFuLuTfERZxiW50TOiv3HbrTKvj7mqOg0v2X3vBRQ3ATgY3_ZzsvJ1Q3zPsIUFCVzd9dHXnnFzUjgsVFmiYXK7cKRsxkRL6KkBGl87RkS3fFy-R9EJhiT2_tqH9/s1600/HH8.jpg


Being a climber this is not much of an issue but what if we could use an adjustable system with a quick release shackle that can be attached to the deck line and ready for use.

I like this solution. I tied it up yesterday and can not wait to put it to use.


The line is connected to the quick release shackle via a prusik loop. This is an attachment hitch everyone should know.


The prusik can be slid to any point along the line but will lock in place under tension. There is a limiting knot at the end of the line to prevent sliding the prusik all the way off.

I made monkeys fist on my quick release pull to make it easy to use with gloves. You can use it on the same side as attached or across deck. On the boat in the image I have my deck line adjustment in front of my cockpit so the shackle can not be moved from side to side. On my other kayak the deck line adjustment is at the bow so this is not an issue.

There are pros and cons to all these systems but this should give you some food for thought. Try different systems and find the one that works best for you.


Friday, January 23, 2015

Trail Sites on the internet and tracking apps for your Smart Phone

Several years ago I started using Wikiloc to save my GPS tracks. Then later I created an EveryTrail account but did not use it much. I returned to it recently and found the interface improved and it had the guide creation feature. I really started using it and moved all my tracks over to the site. It has now been down for a week. This really sucks because I have started using my smart phone and BackCountry Navigator that has a feature to upload directly to EveryTrail. I also installed the EveryTrail app on my phone and was about to purchase a pro account.

Now, I have another account with AllTrails. I believe this one will stay around since it is run by National Geographic. Still not sure how much I will like it. EveryTrail had some nice features like guide creation. Wikiloc's interface has become dated and I have always had issues with adding photos with geo location metadata. They all have phone apps with various uses and the ability to record tracks with your phones GPS. I prefer to use Backcountry Navigator to record my tracks for a many reasons. The one that stands out the most is the ability to download NOAA charts to the phone so I can navigate when I do not have cell service. I still keep a chart on my deck along with a compass and a regular GPS but having a nautical chart on your phone that you can compare with your deck chart makes knowing your location and taking a bearing super simple.

So, what tech do you use for navigation and sharing your trails? Leave a comment ant let me know. I am always looking to test new apps and gadgets. 

If you know what happened to the EveryTrail site let me know. I can not find any information on the interwebs.

A track screenshot from Backcountry Navigator


Thursday, January 22, 2015

Paddle to Lignumvitae Key

On this outing we paddled to Lignumvitae Key. We got there just in time for the tour.

Ranger-guided tours are given twice daily, Friday through Sunday. The park is accessible only by private boat or tour boat.

After the tour we paddled over to Robbie's and explored the mangrove tunnels and the house boats behind Robbie's. Then we paddled to the kayak landing beach at Robbie's and went to The Hungry Tarpon for lunch. Then we paddled back to the Kon Tiki to hang out around the pool.


Leaving Robbie's

Painting we bought at Robbie's. It fit in my hatch to paddle back.


The video was recorded with my digital camera balanced on my spray deck.

Wednesday, January 21, 2015

Paddle around Shell Key

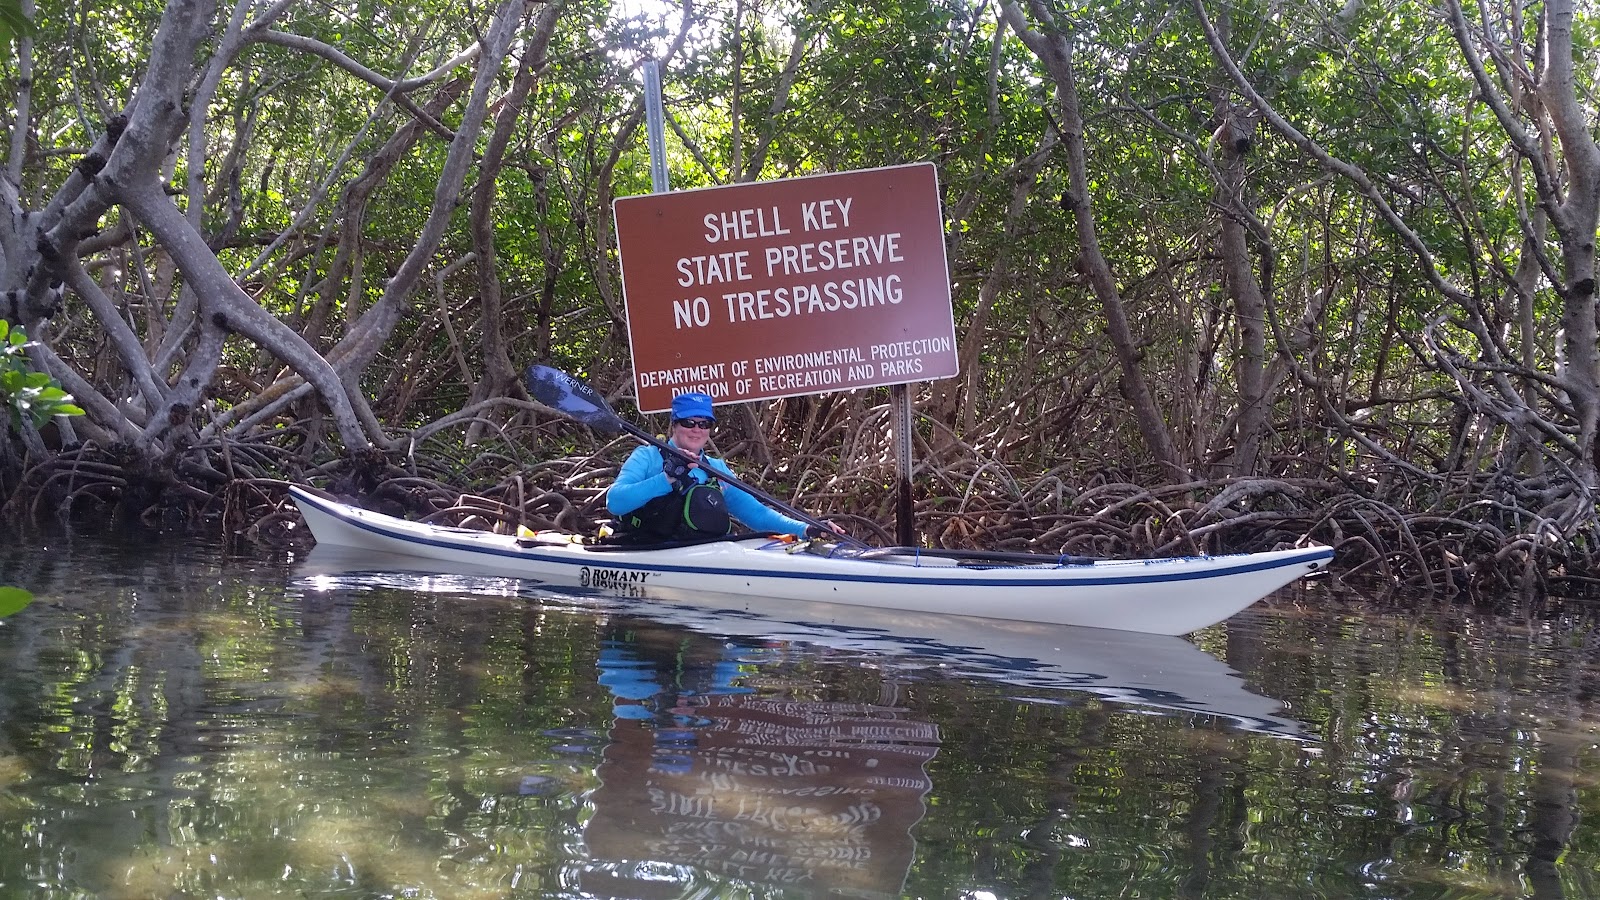
Our first paddle after we arrived at the Kon Tiki we paddled through Horseshoe Key and around Shell Key. An easy paddle to get our vacation started. Horseshoe Key is a bird nesting ground and it is really cool to watch the birds leave in the morning and return in the evening.


Ibis just hanging out 
The Lorax's Wife at the back entrance of Horseshoe Key

Back entrance to Horseshoe Key

Resident of Horseshoe Key

More inhabitants of Horseshoe Key 

The Lorax's Wife capturing the wild life

Selfie

Osprey at Shell Key

Great Heron at Shell Key

Guess I got to close

The Lorax's Wife watching the fish.

OK, we will stay away but good photo op.

Frigate Birds over Horseshoe Key

Find the iguana 

More Frigate birds

The Kon Tiki from the water

Tiki Bar at the end of the dock at the Kon Tiki

Relaxing in one of the hammocks at the Kon Tiki

Paddle to Indian Key

One of our kayak trips while we were in Islamorada was out to Indian Key.

It was a 10.2 mile round trip. We were on a relaxing vacation and not looking to do really long paddles.

We paddled from the Kon Tiki along the shore and out to Indian Key.  There was a nice little breeze blowing in from the east and the tide was coming in so we had to ferry glide across two channels before we turned under a bridge and headed out into the Atlantic. There was a little chop of maybe a foot and a half under the bridge and maybe a foot once we were in the ocean so, it was easy going. There were some larger waves on the east side of Indian Key that were fun to play in as we circumnavigated the island.

Indian Key has an area for kayak landing. It is rocky so be careful if you have a composite kayak. 


Indian Key was the first county seat for Dade County.

The Lorax's Wife near the kayak landing area.

A nice black and white of the kayak landing.

A map of the path ways on Indian Key

A view from the boat dock at Indian Key.

After walking around Indian Key we paddled over to Robbie's to get some lunch at the Hungry Tarpon.

A selfie at The Hungry Tarpon, with The Lorax's Wife in the back ground.
Robbie's is a must visit place while you are in Islamorada. It is an interesting tourist place consisting of shacks that hold artist doing paintings, trinket shops, kayak rentals and of course The Hungry Tarpon.

After some excellent Dolphin Tacos  we got back in our kayaks and paddled back to the Kon Tiki to lounge by the pool.


Kayaking Florida Bay from Islamorada

For the holidays we spent a couple weeks in Islamorada over Christmas and New Years. It is the half way point between Miami and Key West. Islamorada, a "Village of Islands," is an incorporated village in Monroe County, Florida, United States. We find it to be a great central location to explore all the keys have to offer. 

We prefer to stay at the Kon Tiki Resort. It is a little village style resort with cottage style accommodation located on the Gulf side of the island. It is located in a sheltered area known as Little Basin. There are several Keys and areas to paddle within a mile of the launch making it a great spot for the recreational paddler that does not like to cover a long distance. The have a nice lagoon for swimming a heated pool and boat ramp.

This is the Kon Tiki.


We made several paddles from the boat launch to the surrounding keys.

Keys of note are Indian Key, Lignumvitae Key, Horseshoe Key and Shell Key. There are several Keys called Shell Key so it can get confusing. Also places to check out include Islamorada Fish Company, Robbie's and for you kayaking supply needs there is Backcountry Cowboy Outfitters.

This location also makes a good base to do some camping paddles and longer Paddles into Florida Bay. Little Rabbit Key is only about 12.5 miles from the Kon tiki. Carl Ross Key has been closed to camping but is only 8 miles from the Kon Tiki launch. And there are many other keys to explore in the Florida Bay from this location.

I will post our different paddles from our trip as separate post. 

Tiki Bar and fish cleaning station at the end of the dock.
Sitting at the end of the dock at the Kon Tiki drinking Key Lime Daiquiris 

The Tarpon at Robbie's

The Kon Tiki from the water