Monday, September 7, 2015

Chaptico Wharf to Newtowne Neck State Park

On Saturday September, 5 2015 the wife and I joined a group of CPA paddlers in a trip around Coltons Point, MD. This is part of a series of trips being lead by Ralph H. to help plan a water trail down the Potomac. He has been contacting both the Virginia and Maryland park services and working to get paddle up camp sites established. This was the 6th leg of the trip. My experience on this trip was very positive.

This is Ralph's original trip itinerary for the paddle series he has dubbed Potomac Passage Maker Tour. http://aceheimlich.com/CPA/Potomac%20Passage%20Maker%20Tour%20Preliminary%20Itinerary%202_4_2015.pdf

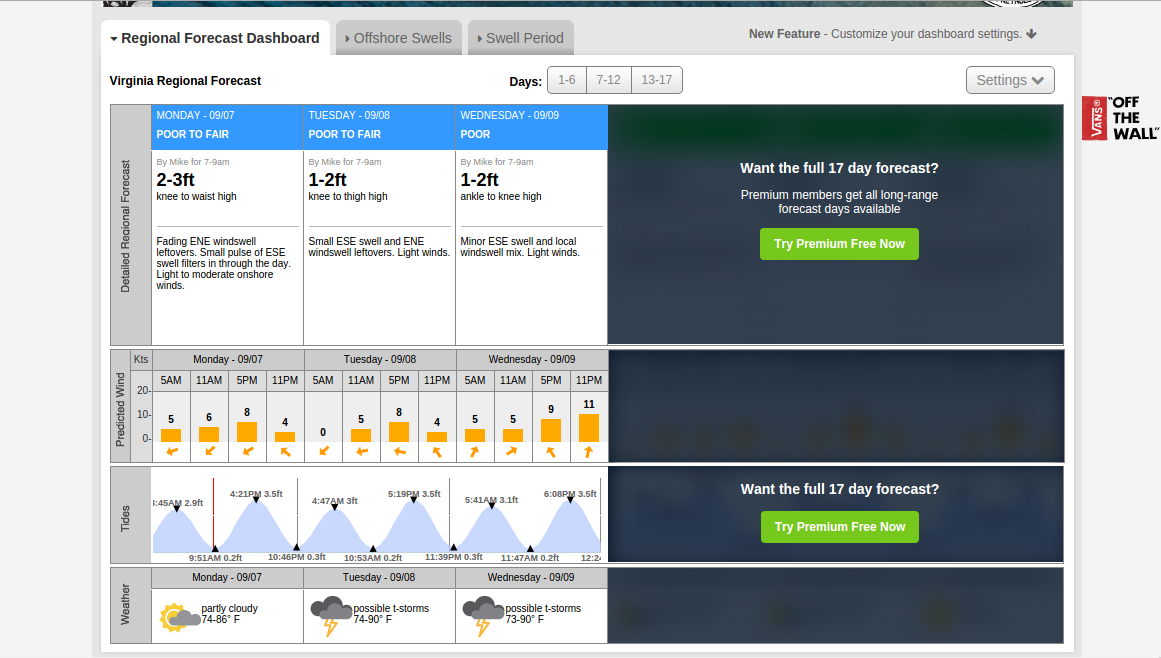
The weather report for the trip was good but the winds were predicted to be 10 to 15 with gust up to 20. We lucked out because the winds were not that strong on the water and at our lunch break I check the NOAA station and the winds were 7 to 9. That made it a pleasant and easy day on the water.

The only truly exciting part was the pair of large fish, possibly sharks, that we startled half way into Breton Bay. They bolted between my kayak and Tim's kayak. They were about 6 feet I would guess. A bull shark was just caught in that area on Thursday September 3rd. See the pictures here, http://wjla.com/news/local/photos-8-foot-bull-shark-caught-near-coltons-point-in-maryland 

After the paddle we went to Fitzie's for a nice seafood dinner then shuttling people and boats back to their cars. 

Now the track and some photos of the trip.


Getting ready to put in at Chaptico Wharf

The Lorax's Wife


Our host Ralph H.


Our fleet on the beach at St. Clements Island

Lunch by the lighthouse


The group as they leave me behind. Heading into Breton Bay.

Online Resources to Plan Your Next Kayak Outing

So, you are planning that next kayak trip. This is longer than just paddling a couple miles along the shore in your usual location. You want to plan your route but you do not have all the cool and expensive mapping software. Where do you start?

First you may want a chart of the area to print out and have with you. All the NOAA charts are available free online in PDF Format.

 http://www.charts.noaa.gov/InteractiveCatalog/nrnc.shtml

There is also an online chart viewer that can be used to plan your route and export it to your GPS.

http://earthnc.com/chartviewer/

Play around with this site and see all the information is has to offer.

Next you need to plan and know what to expect from the tides, currents and weather. I personally turn to NOAA for this information also. Other sites have this information but their data source is NOAA.

Tides and Currents
https://tidesandcurrents.noaa.gov/products.html

This site is not as user friendly as one would hope but if you poke around for a bit you will find it has all the information you want. It has loads of data including graphs of water temperatures, currents and wave averages over time.

Another place for tide information is http://tbone.biol.sc.edu/tide/

Then there is the National Weather Service provided by NOAA. I like to get and hour by hour report in tabular format and include wave prediction.

http://www.nws.noaa.gov/om/marine/home.htm


Then there is the information available from the buoy stations. http://www.ndbc.noaa.gov/


The National Data Buoy Center is a great resource for wind, waves and water temperature. You can also reach this site from the forecast page in the NWS Marine forecast page.

You will also want wave and surf information if you are paddling near the mouth of a bay or in the ocean. These are two sites I like to use.

http://www.surfline.com/


http://www.stormsurf.com/


Click around on StormSurf because it contains a lot of data. In the image above you can see the link tabs above the graphic, these will change the display map to show you all kinds fo data about the area.

Next you will want to have a float plan that you give to a family member or friend in the event you do not arrive back when you are expected.

Here are links to some example float plans.

http://floatplancentral.cgaux.org/
http://www.exploreri.org/documents/float_plan-seakayakermag.pdf
http://www.nps.gov/calo/planyourvisit/upload/Canoe-and-Kayak-Float-Plan_rev04-13.pdf

You should find one that works for you and make filing a float plan a habit even on short trips.

To make life even easier in this age of technology you can file a float plan from your smart phone.

 Float Plan Apps
http://www.uscg.mil/mobile/
http://www.americancanoe.org/?page=PaddleReady
http://www.thefloatplanapp.com/  - Android version still under development

And just a nice general reference for all things sea kayaking you might want to check out the "Online Sea Kayaking Referance Book"

Hopefully you find som of these sites useful. Pleas share your favorite kayaking trip prep sites in the comments.

Saturday, August 29, 2015

Leesylvania to Mallows Bay

So, I am late posting about this trip. There is not much to say. It was an 10.7 mile round trip paddle to Mallows Bay and back form Leesylvania State Park, VA.

The Ghost Fleet of Mallows Bay

So, here is the track and some photos of the trip.


Friday, August 28, 2015

The certification crisis. Is certification necessary?

We all know that the popularity of sea kayaking and expedition kayaking is waning. There is much debate about why this is happening. And like everyone else, I have my theories and opinions. First is elitists and safety wonks that populate the clubs and believe they are the only one that know how to kayak. The second is the rampant growth and push towards certification. Or maybe the ease and low entry of SUP.

I believe that there is much you need to learn as you advance to open water kayaking. I have always been the kind of guy who jumps in with both feet and will learn what I need to know through experience. I believe that most kayakers should learn this way. In my opinion this kind of learning will stick with you. Experiential learning is one of the best forms and I don't mean see then do method of teaching. Get a boat, life vest and paddle and go for it. That is how the first kayakers did it.
Now don't get me wrong certification is not a bad thing in and of itself. But just to kayak you do not need certification. I became an instructor for a good reason, my wife wanted me to do it. With assessments based on a standard scale you can judge if a person should be capable of a given paddle. Yet, there are clubs that have there own courses and if you take their course then you are golden whether you actually absorbed the knowledge or not. So maybe a standardized assessment is not a bad thing. Hard call.

If you paddle in a reservoir or a calm lake or a slow moving stream, chances are you do not need classes and certification. Now this is assuming you are not a dumb ass and use common sense. Lets face it, you can not protect people from themselves.

So, I was going somewhere with this. Now where was I going?

Oh, I remember. Elitists and safety wonks and certification. With clubs you meet all kinds of people and like any group there are those that can do, those that talk, those that judge and then there are the people having fun. It just appears that in these clubs there are a vocal few that think they know all about safety and they set stupid rules and basically drive the fun people away. It happens in all groups not just kayaking.

With our club my standard for people is, be able to get in your boat have an idea of how to paddle straight and wear your PFD properly at all times on the water. Now lets paddle and see the wildlife. If the leader and assistants have some assisted rescue skills and you lead with common sense it will be a safe fun trip. Some clubs harp on wearing a spray deck. Really? I am not taking a club paddle into 2 foot waves, that is for vetted peer paddles.

Lets not get bogged down with rules that don't make sense. The first group I paddled with had a must have list of equipment to paddle with them, including a throw bag, for flat water paddles.

Lost my way again. Can't keep my train of thought from derailing.

People want to paddle with other people. So, they join clubs and are met with elitists and rules that make no sense so they quit the sport. Or they are told they need this class or that class and quit. All they really need is a kayak, paddle, PFD and water appropriate clothing. The rest will come. If they enjoy what they are doing they will want to learn and improve or just stay at the level they are and enjoy the water. And both are acceptable paths as far as I am concerned.

So, in conclusion don't be a safety wonk and don't push the certification nonsense. People will learn at their pace in the way they choose and to an extent they choose. Wow, that was a long road to say so little.

Certification is not killing the sport. The business of certification might. Forcing certification to buy or rent a kayak will kill it. I think like everything else the over obsessed safety culture has created a generation of risk adverse people. That my have contributed to the decline. And the elitists and safety wonks are taking the fun out of it. Not all perceived dangers are valid dangers. Lets let people enjoy kayaking and learn as they go. Don't push certification or enforce rules and equipment requirements that are just not needed.

Oh wait.... I was at an end. OK, I am stopping now.

Tuesday, May 26, 2015

My Vegvísir patch. Now I will never get lost.

I finally sewed my Vegvísir patch onto one of my PFDs. If you know me at all you know that I studied Norse and early Germanic mythology and I thought this was kind of fitting for a PFD. My wife bought the patch for me.

The Vegvísir is also known as the Viking or Icelandic compass. 

The symbol is attested in the Huld Manuscript, collected in Iceland by Geir Vigfusson in 1860 (but consisting of material of earlier origin). A leaf of the manuscript provides a drawing of the Vegvísir symbol, giving its name, and, in prose, declaring that "if this sign is carried, one will never lose one's way in storms or bad weather, even when the way is not known".

It is said to be associated to Ægir.
In Norse mythology, Ægir (Old Norse "sea") is a sea jötunn associated with the ocean. The Jötnar are a mythological race that live in Jötunheimr, one of the nine worlds of Norse cosmology.


Monday, May 18, 2015

I am certifiable or was that certified?

Welcome back readers and hello new readers.

If you have read my "What is this blog about and why another blog?" post, I state that I know squat about kayak except for taking some basic instruction classes. That has changed, sort of, I guess.

A couple weeks ago I took an IDW/ICE from Mike Aronoff. After a week of being put through our paces I came out of it as an ACA L3 Coastal Kayaking Instructor. If you know anything about Mike you understand that it was not an easy ordeal.

Now, I am not sure what I will do with it.

I have other skills that I use to earn a living and the pay is better than what I would make as a kayaking instructor. I stated before that I was once an AMGA Climbing instructor. I tried to make that work as a career but the money is just not there, at least where I live.  I managed to survive at it for 3 years but not at the level of lifestyle I had grown accustomed. It made a great part time job for 16 years and I loved the pro deals.

I will probably teach some classes on the weekends and keep my certification current and work toward L4 and L5 and maybe BCU but it is mostly for personal enrichment and not for a career. Maybe a second career after I retire or maybe open my own business one day.

So, I guess I can no longer claim ignorance about sea kayaking. I know a few things about it. My post are still informational and not instructional (well except the ones about boat repair). Mostly I am expressing thoughts and opinions. Please seek out instruction and practice the skills that will make your journey safe. And have fun.

Always have fun and don't take life to seriously. Remember, no one gets out alive.

Composite Kayak Repair - Fixing the Whisky after my Charlston Rough Water Classes

While at the East Coast Paddlesports & Outdoor Festival this year I took a few classes offered through Sea Kayak Carolina. These were rough water courses from Kayak Waveology and a surf course with Dale Williams. I had a great time but my Whisky 16 did not handle it as well.

In a review of the Whisky 16 I defended the light lay up of the fiberglass. It actually gives a little flex and can prevent sever damage when you have a close call among the rocks. It has a hex core bottom that gives the rigidness the hull needs. I love the design of the kayak but it has a flaw.

You will see in the picture that the fiberglass flexed enough to crack the gelcoat and the resin in the glassing. This happened when the kayak slapped the water after I had to shot over a 4 foot wave that was about to break outside the zone we were surfing, basically breaking on top of us. So, upon inspection I noticed two things that contributed to the cracking. First, it cracked just past the hex core where it does not cover the full length of the hull. Second, the fiberglass in the hull of the front hatch does not appear to be fully impregnated with resin.


So, I found out that the glass hull cracked and now had flex in it by the cracking of the gelcoat. 

 You can see that it really does not stand out much until you zoom in. I actually did not notice it until we got home and we were unloading the kayaks.

You can see by the way it is cracked and the lack of scratches or other signs of impact that this was caused by stress.

It is actually an easy thing to repair since there are no holes in the hull. The area just needs some resin in the stressed area and some added glass for reinforcement. Then a gelcoat repair.

First thing you need to do is prep the area. I start with a 230 grit sandpaper to clean and rough the area then I clean out the dust and wipe the area down with Acetone.

You want the surface to be well cleaned for the resin to adhere to the surface. The sanding will also open the original fiberglass the was not well impregnated with resin. This will allow you to force additional resin into the original glass.

 Next thing is to get your fiberglass and cut it to the size you need for the project. I use a 6 ounce fiberglass instead of cross layering sheets of 3 ounce. This is a repair and not a structural build.

Your glass should cover the area of damage and continue a couple inches around the damaged area. The kayak had stress areas along the sides as well as the large area on the bottom so, I cut a piece big enough to cover the sides as well as the bottom cracking.

Next I spread the resin on the area that is cracked and force it into the cracks. this will fill in any gaps in the original glass and fill in areas that were not fully impregnated originally. This will created a stronger bond with the new fiberglass.


Then you lay the new glass onto the area and work it into the resin. Then you start adding more resin into the new glass and forcing it in with a squeegee. You need to use enough resin to fully saturate the fiberglass.


On this repair I added some additional glass on the bottom where it was the weakest form the cracking. This will add additional support for the area and give it added strength.


As you work the resin into the glass you will also work out the air bubbles and press the fiberglass flat and into any corners. It should lay as smoothly as possible and have full contact to the area of coverage.

In the photo below you can see the repair with the double layer of fiberglass on the bottom and a couple additional patch areas on the  left side.


Once you have the fiberglass full of resin and smoothed out you need to let it cure. I use an epoxy resin that cures in about 6 hours at 80 degrees fahrenheit. I generally let it cure over night to be on the safe side. The resign can nor over cure but it can be an issue to try and sand it before it has cured enough.


Now you will sand the area you just patched. Not to much. You do not want to sand away the fiberglass you have just applied. You just want to sand down the edges where the fiberglass willbe rough and rough up the resin on the top of the glass to add a finishing coat.

  After the sanding to smooth the edges you will want to clean out the dust. Then once again clean the area with acetone to remove any grime and grease left by your hands.


After you have the surface sanded and cleaned you will notice the sharp hard edges of the fiberglass. Also the surface will have an uneven texture to it. To get a smoother surface you will add some additional resin around the edges with a paint brush. then you can brush on an additional  layer on the surface to get things relatively smooth. Since this is the inside of the hatch I do not get overly particular with it. I just do not want any rough edges to abraid my dry bags when I slide them in and out.


Now you need to let the resin cure. After it cures it should be fairly smooth without sharp edges. You and apply more resin as needed.


Now, it is time to repair the gelcoat. This is where you get particular about the sanding and smoothness. First, you have to do some prep work by removing the cracked gelcoat and and prep the surface. I use a polyester gelcoat paste for this type of repair. Also I don't have the area to use a sprayer and painting the gelcoat on with a brush can be problematic. The paste has issues of itself. You have to be really careful about air bubbles and after the first sanding you may find that you need to apply paste again to fill air bubbles.

first thing you want to do is chip off any loose cracked gelcoat and open any cracks. This will allow you to have an area to apply the new gelcoat and it will be attached to gelcoat that is tightly bonded to the fiberglass.


Make sure you do not dig into the fiberglass base. You do not want to compromise the strength of the glass.  After you have chipped out all the loose gelcoat and scraped open the cracks you will need to sand the surface. I use a 300 grit sandpaper. Then thoroughly clean the area with acetone.


Now you mix and apply your gel paste. My hull is white but not a true white. I do not bother trying to match the color. I pigment my gelcoat with a true white. This allows me to inspect the repaired area over time but you have to look closely to notice the difference.

When you spread the paste on try to keep it smooth to prevent air bubbles and do not over work it. You are not trying to get it even with the original gelcoat. This is done during the sanding.

 Then you let it cure. Some people like to let it cure to a firm state but, not fully cured. The idea is it is easier to do the initial sanding. I like to let it cure for at least 12 hours so,I generally leave it overnight.

I find it is less likely that I will oversand the patched areas if the gelcoat has fully cured.


Next is the initial sanding.

I start with a 300 grit sandpaper and sand the patched area until the are almost flush with the original surface. I sand in a circular motion trying to stay on the patched area and following the kayaks contours.

The sanding block I use is cut from a piece of closed cell structural foam.

You can see in the photos that the sanding gets almost flush but not quite. The reason for this is to allow for the wet sanding that will go through 3 grades of grit to get a smooth finish.

The finish will be the most time consuming depending on how much of a smooth finish you want.
For the wet sanding I use sanding sponges I get from HomeDepot.

I have a 320 a 400 and a 600. I start with the 320 and sand the patched area pretty much flush then I move to the 400. When it is fairly smooth to the touch I move to the 600 to finish the surface.

The surface will still have a dull look to it. Next I use a fiberglass polish to start giving it a little shine.

Take you time with the wetsanding and polishing. This will be what defines your work. This is the surface that people see and notice. It will also be the deciding factor of how much you can charge if you decide to do the repairs for others.  In my area there are very few choices of places to go for composite boat repairs.


 Polishing can be done by hand or with and electric car buffer. I chose to do this one by hand because it is my boat and I was not concerned about a high gloss shine. If you want a high gloss shine use an electric buffer and go over the area a couple time with the polish the add a couple coats of boat wax.

 Give it a good wipe down and a coat of wax.

I use a spray on boat wax. If you want a high gloss shine use paste wax and a power buffer.
This is the finished surface. If not for the light color difference you would not know a repair had been done.

This should help you get started on your own repairs. Or, if you are in the Washington Metro Area you can look me up. Reasonable rates but I have a real job so repairs will take atleast a week.